Setting up for AP Invoice Automation
Primarily, ARM AP Invoice Automation uses one of three OCR solutions to automate the creation of a Draft Invoice:
-
Precise - Smart Invoice Capture (SIC)
-
Ancora - DocStar IDC
-
DocAlpha - Artsyl’s docAlpha
This section covers setting up and using the Precise - Smart Invoice Capture (SIC) solution. This solution also provides AI-Matching between the Draft Invoice and PO Receipts, which means that the entire AP Invoicing process can be fully automated, with manual input only required for exceptions.
The process involves the following steps:
For a summary of the AP Invoice Automation process, see AP Automation.
Step 1: Set up the OCR Service Settings
Provide the following parameters:
-
OCR service url
-
OCR service tenant id
-
OCR service user name
-
OCR service password
This step is covered in the ARM Installation Guide.
Step 2: Select the OCR Vendor
Select Precise - Smart Invoice Capture (SIC) as the OCR Vendor in Global Settings.
View Details

Step 3: Define the Worklist and OCR Root Folder Path
The Worklist is where Invoice PDFs are placed. ARM removes the Invoices from the Worklist for further processing.
- Step 3.1: Define the Worklist
-
Each Company has its own Worklist. In the Company Settings, name a Worklist for each Company.
Tip: Best practice is to name the Worklist with the Company Name. View example
For example, in the Company Settings for company EPIC06, give the AP Invoice Worklist Folder a value of EPIC06.

- Step 3.2: Define the OCR Root Folder Path
-
In Global Settings, set up the following three values to define the full path:
-
Worklist and OCR Storage Base Path: In our example, this is: C:\inetpub\wwwroot\ARM8040\AppData\Attachments.
-
Worklist and OCR Storage Root Folder Name: In our example, this is: Worklist. See Setting the Attachment Storage type.
-
Worklist and OCR Archived Storage Root Folder Name: In our example, this is: WorkListArchived.
-
Step 4: Create the Folder Structures for the Worklist
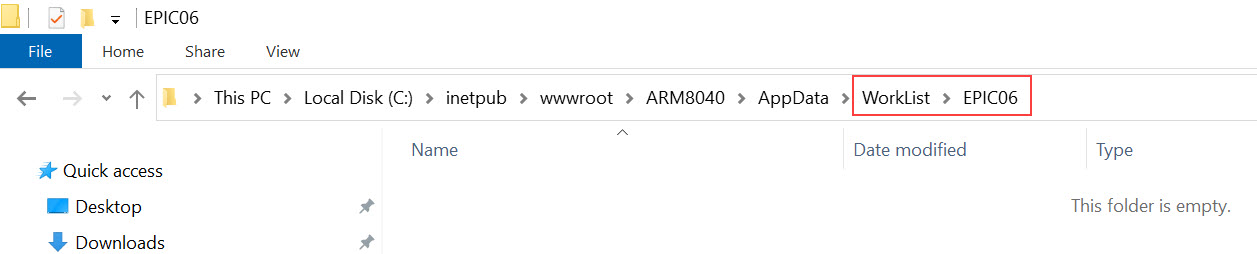
In File Explorer, create the Worklist folder structures to match those defined in the OCR Root Folder Path settings.
View example
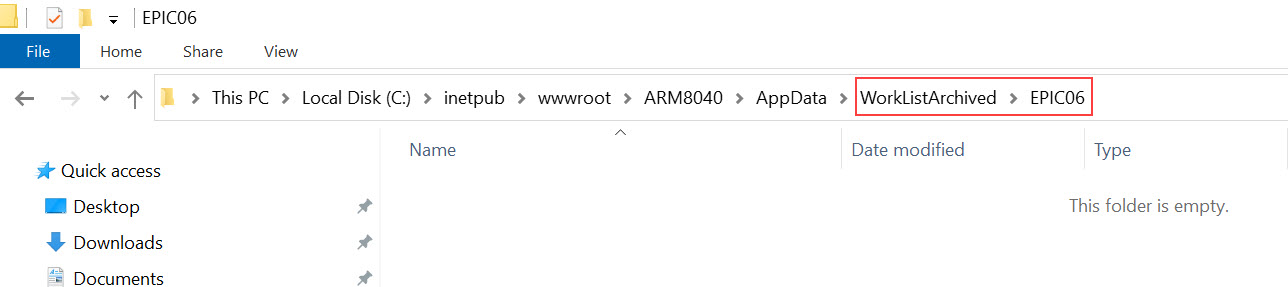
In our example from above, this is how the folder structures appear for the Worklist and the WorklistArchived folders, respectively.
|
|
Worklist Folder structure |
|
|
|
Worklist Archived Folder structure |
Step 5: Set the OCR Settings in Company Settings
Set the OCR General and OCR Suggestions settings.
-
See how the OCR General settings are used in the OCR (optical character recognition) phase.
-
See how the OCR Suggestions settings are used in the creation of Draft Invoices during the OCR phase.
Review and adjust the values for the Low Threshold, High Threshold and (where applicable) set the Trust Inferred Value option, for the various Settings. An example Setting is [PaymentTerms] Trust Confidence Thresholds. The values that you assign to the thresholds determine whether the suggested value is added to the field in the Draft Invoices (exceeds Low Threshold) and whether it is accepted for automatic AP Invoice creation (exceeds High Threshold).
See OCR Settings in Company Settings.
Step 6: Set the AI Matching Settings in Company Settings
This tab in Company Settings is only available when Precise - Smart Invoice Capture (SIC) is the selected OCR Vendor.
See: AI Matching in Company Settings.
Step 7: Create Tolerance Codes
Create tolerance codes for AP Invoice for Receipts and Purchase Order Receipts. This is used to send AP Invoices for approvals, if the PO Receipts are not properly matched with the AP Invoice lines. See Tolerance Settings.
Step 8: Create an Approval Tree for AP Invoice
Enable and activate an approval tree for the AP Invoice Document Type. See Approvals Maintenance. If you need to create a new approval tree, see Adding an Approval Tree.
Step 9: Start the Integration jobs for OCR Scan and OCR Retry
These jobs control optical character recognition (OCR) in Precise Smart Invoice Capture (SIC). The jobs are controlled in the Integration dashboard. See Integration Jobs.
Step 10: Test out AP Automation
The following two steps go together. Test AP Automation as follows:
-
Copy a dummy AP Invoice into the Worklist folder.
-
Open the Draft Invoice that is created and examine and evaluate errors and warnings. Experiment with field matches.
-
Adjust the Draft Invoice, then submit to create an AP Invoice.
-
Create receipt lines to match the invoice lines. Test out how to match lines manually, by working through the matching candidates.
-
Once the receipt lines are matched, submit the invoice.
-
If receipt lines are not perfectly matched, you can test out the tolerance codes, by having a very small tolerance (causing the tolerance to fail).
-
Next, test out the approval workflow.
Try to understand where Invoices are getting stuck. The goal is to get invoices through as many stages as possible, without manual intervention - except in special circumstances where manual intervention is important.
When you have identified areas that can be fine-tuned, follow the next step, fine-tuning the process.