Custom Form Designer
Use Custom Form Designer to create new Requisition Types. Each Custom Form represents a Requisition Type.
| Ensure that the Global Setting Use Requisition Type is set to Yes to enable the Requisition Type feature on Requisitions. |
Permissions
You require a role with the Maintain Settings permission to access Custom Form Designer.
See Permissions in ARM.
Custom Forms give you the ability to group Requisitions into different Requisition Types.
You can use Custom Form Designer to apply the following to a new requisition of that Requisition Type:
-
Set a default buyer.
-
Create an Import Template.
-
Create Report Views.
-
Enable an Ad hoc PO Attachment.
-
Exclude catalogue items from being added.
-
Include selected validation rules.
-
Add custom fields, with the ability to map these to fields in the ARM database.
See details in Maintaining Custom Forms.
User Access to Requisition Types
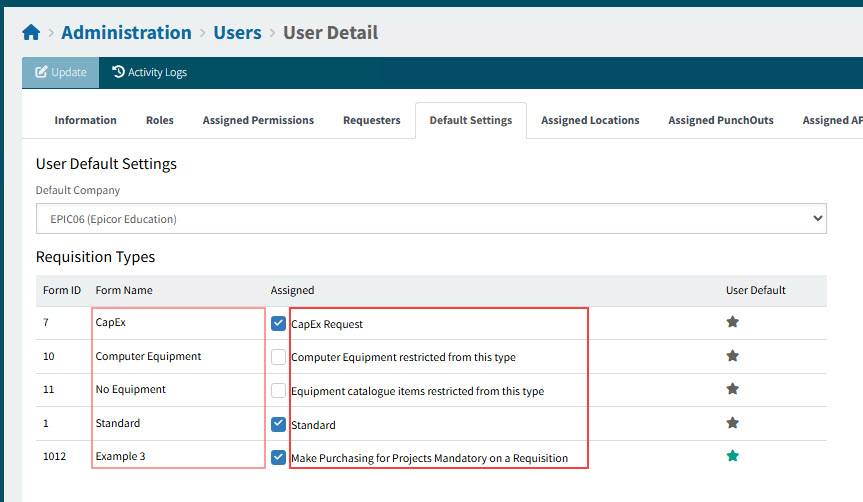
You can assign or limit the types of requisitions that Requisitioners can create or edit using the Requisition Type check boxes in the Default Settings tab sheet on the User Detail page.
Example of Requisition Types on the User Detail page:
|

| An Approver can approve or reject a requisition, even if they do not have access to its Requisition Type. |
Thus, some users might be creators or editors of Requisition Type A requisitions, while others might creators or editors of Requisition Type B requisitions, and so on. A user may also be a creator or editor of any requisition type. See Defaults Settings tab on User Detail page.
Custom Forms and Requisition Types in Approval Trees
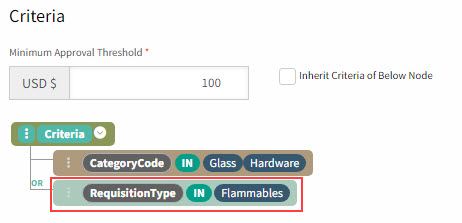
Approval criteria can be limited to requisitions of specific Requisition Types, and not of others - as defined in the Approval tree.
You can use CustomForm or RequisitionType as a field in a Criteria’s Node in an Advanced Approval Tree.
See example:
|
Maintaining Custom Forms
-
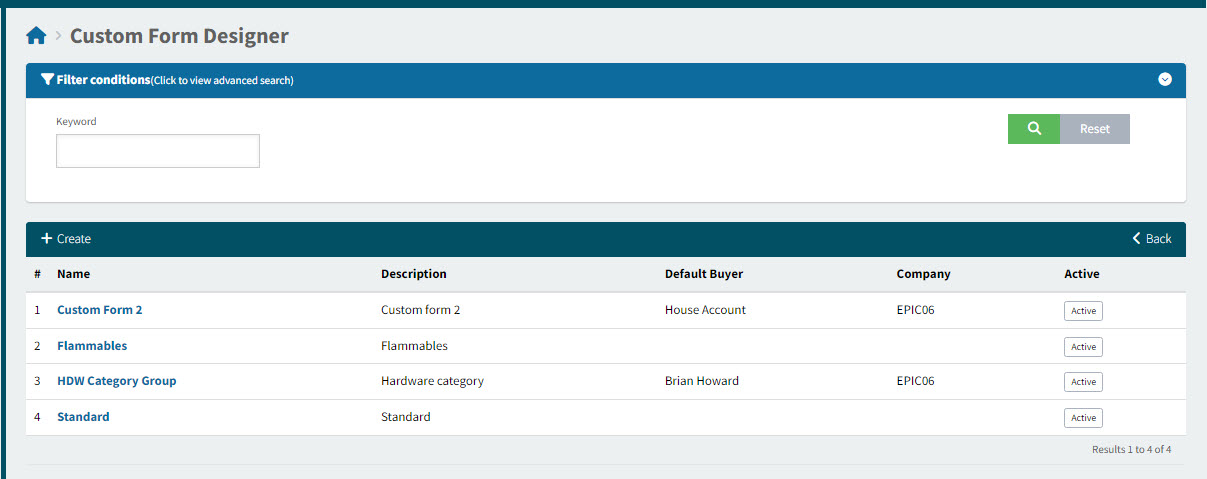
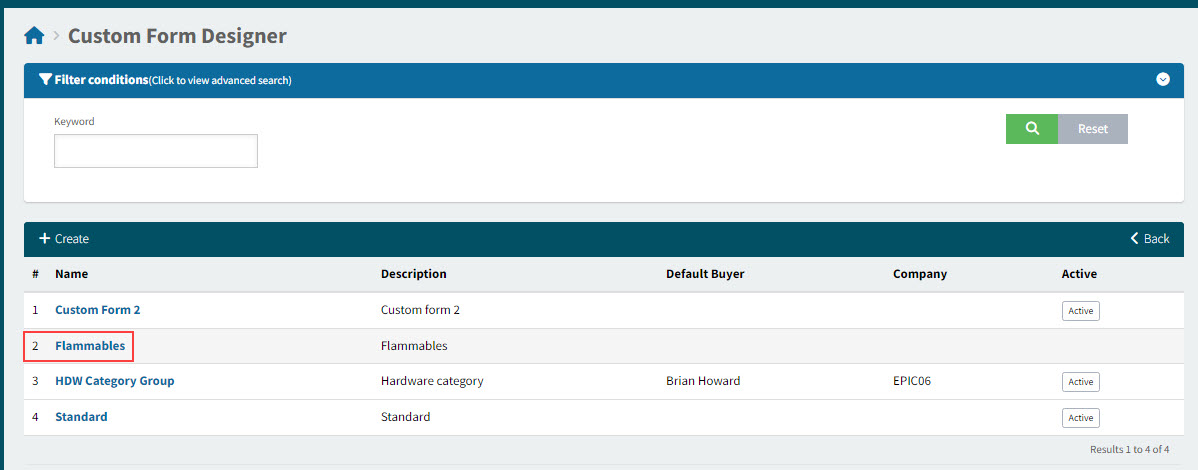
Select the Custom Form Designer menu item on the Administration page. See Administration Page.
The Custom Form Designer page displays.
Adding a Custom Form
-
Navigate to Custom Form Designer.
-
Select
 Create on the menu bar.
The Custom Form Designer > Add New page opens.
-
Update the fields for the new Custom Form.
Complete the Custom Form Designer header section:
Item Order Optionally select an order for the item’s list sequence.
Name The name is used when you select a Requisition Type.
Description Describe how this requisition type should be used.
On the Administration > Users > User Detail page, on the Default Settings tab, the Requisition Type’s Description appears alongside the Name.
Example
PO Report Template Enter a report template name. This field is enabled when you select the Create Report Views check box.
Buyer info Use this to select a default buyer for new requisitions using this requisition type.
Active This is selected by default. To remove this Custom Form from the list of available Requisition Types, clear the check box.
Create Import Template When this is selected, a new custom Requisition Line Import template is available to users who can access this Custom Form. This import file will contain all of the Custom Fields (UDFs) created for the Custom Form. The User can import multiple requisition lines with Custom Form data on each line.
Create Report Views When this is selected, two SQL Views are generated for the Custom Form and saved to the ARM database. The SQL views are named according to the following convention:
-
vwPurchaseOrder_[Req Type Name]_[Custom Form ID]
-
vwPurchaseOrderLine_[Req Type Name]_[Custom Form ID]
All Purchase Order Headers and lines that contain UDF data values for the Custom Form are stored in the views and can be used for reporting. The reporting template is defined in PO Report Template.
Enable Ad hoc PO Attachment ARM allows users to define ‘ad hoc’ logic for the handling of Purchase Order attachments when the Purchase Order header or line meets the given Requisition Type criteria.
When ARM detects that the Purchase Order header and/or its lines have ad hoc attachment logic, it automatically applies the configured naming convention and saves the Purchase Order and all associated attachments to the designated network directory.
When this check box is selected, the fields Ad hoc PO Attachment Target Directory and Ad hoc PO Attachment Naming Rule are displayed.
Ad hoc PO Attachment Target Directory This field is only visible when Enable Ad hoc PO Attachment is selected.
Enter the folder path for the designated network directory for storing Ad hoc PO attachments.
Ensure that the directory exists and that ARM has Write permissions for the directory. Ad hoc PO Attachment Naming Rule This field is only visible when Enable Ad hoc PO Attachment is selected.
Enter a naming convention to be used for Ad hoc PO attachments.
All fields from PurchaseOrder table and a special field OriginalName can be used.
For example: PurchaseOrder_{CompanyID}-{E9PONumberReference}_{OriginalName}
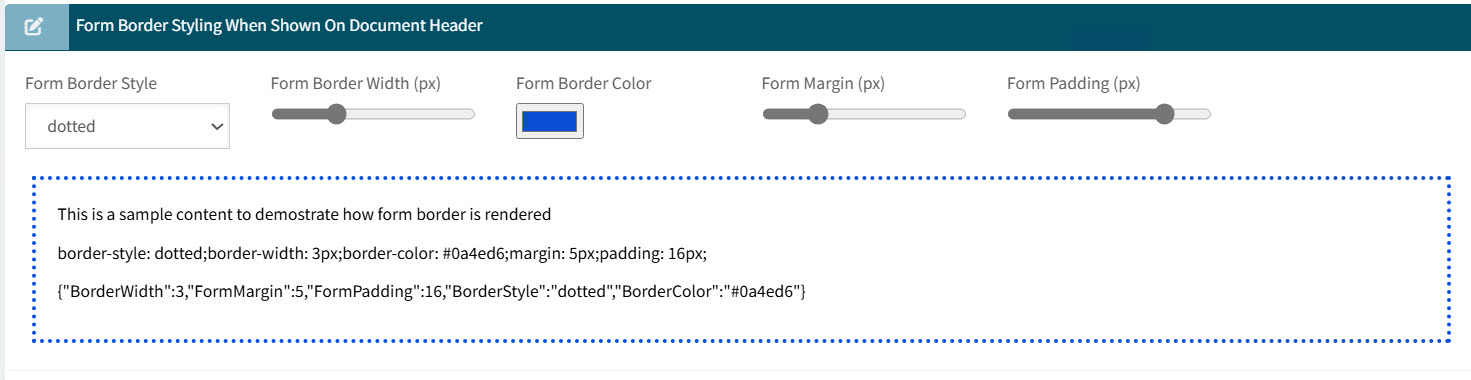
Complete the Form Border Styling When Shown On Document Header section:
The section is used for optionally styling the section showing any Custom Fields are shown on the requisition header, in the Requisition Type section.
Example

Select the following for the border style. A preview of the styling appears in this section, provided you select a visible Form Border Style.
Form Border Style Select a line type from the drop-down list. For example, dashed, dotted, solid.
Form Border Width (px) Use the slider to choose the width of the border.
Form Border Color Optionally select a different color, using the color picker (the default is black).
Form Margin (px) Use the slider to position the border in relation to the edge of the section.
Form Padding (px) Use the slider to position the padding between the border and the text within.
See preview of selected settings:
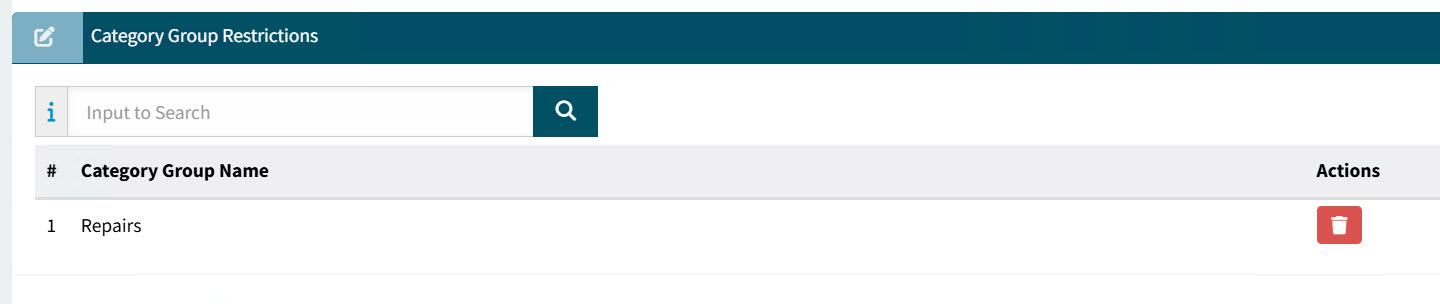
Complete the Category Group Restrictions section:
If you want to restrict the catalogue items that can be added to requisitions of this Requisition Type, you can add Category Group Restrictions.
Catalogue items that can be added to a requisition are restricted to those belonging to the categories in this list.
-
Search for and select one or more Category Groups.
-
You can remove a Category Group from this list by clicking the Delete button under Actions.
Complete the Validation Rules section:
Add one or more Validation Rules if you want validation for Requisitions of this Requisition Type. For example, you can ensure that a Requisition does not pass validation unless it has an attachment, by adding the Attachment is Mandatory rule.
-
Search for and select one or more Validation Rules.
-
You can remove a Validation Rule from this list by clicking the
 Delete button under Actions.
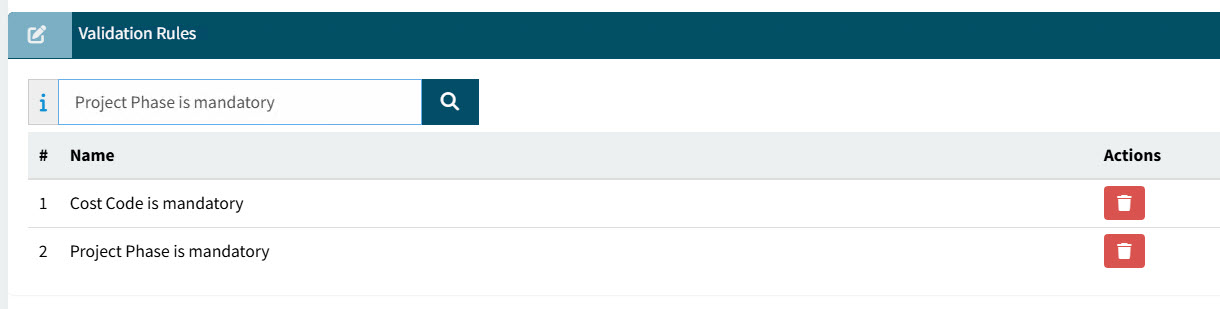
Validation Rules may also be limited to selected Companies and Document Types. See Validation Rules. Complete the Sections layout section:
If the Requisition Type has Custom Fields, these will appear on a Custom Form, accessible from the requisition form when this requisition type is selected.
You can organize the layout of the custom form by adding sections here and then allocating these sections to the custom fields.
-
For a section to be visible:
-
It must be active.
-
It must contain at least one active Custom Field.
-
-
Sections are not a requirement. Active custom fields will appear on the custom form, with or without sections.
-
Add one or more sections.
-
Click + Add Section on the Sections menu bar to add a new section.
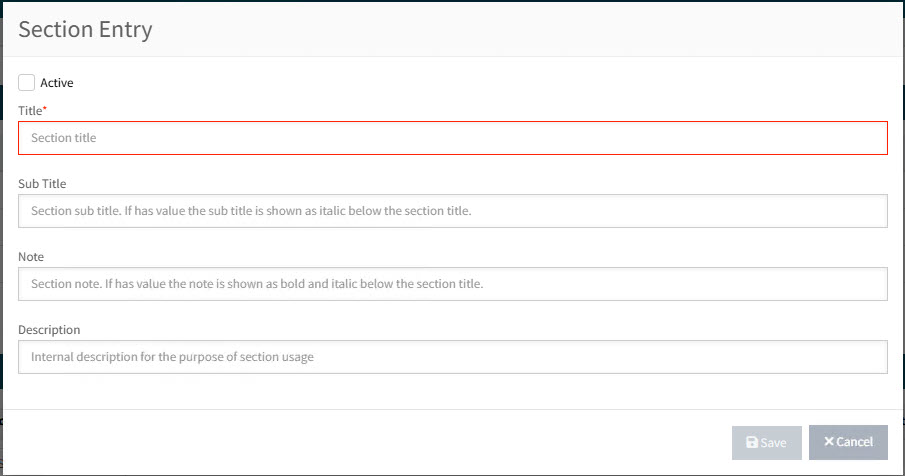
This opens the Section Entry pop-up:
-
Select Active. This ensures the section appears on the custom form, provided it contains custom fields.
-
Enter a Title. This appears on the section in the custom form.
-
Optionally enter the following fields:
-
Sub Title: This appears below the section title, in italics, on the custom form.
-
Note: This appears as bold and italic below the section title, on the custom form.
-
Description: This description does not appear on the custom form and can only be viewed on the Custom Form Designer page.
-
-
Click Save.
View example of the section values on a custom form:

-
-
If there are multiple sections, you can organize their order of appearance, by using the arrow keys Move to top, Move up, Move down, Move to bottom under the Actions column.

Example of sections and custom fields:
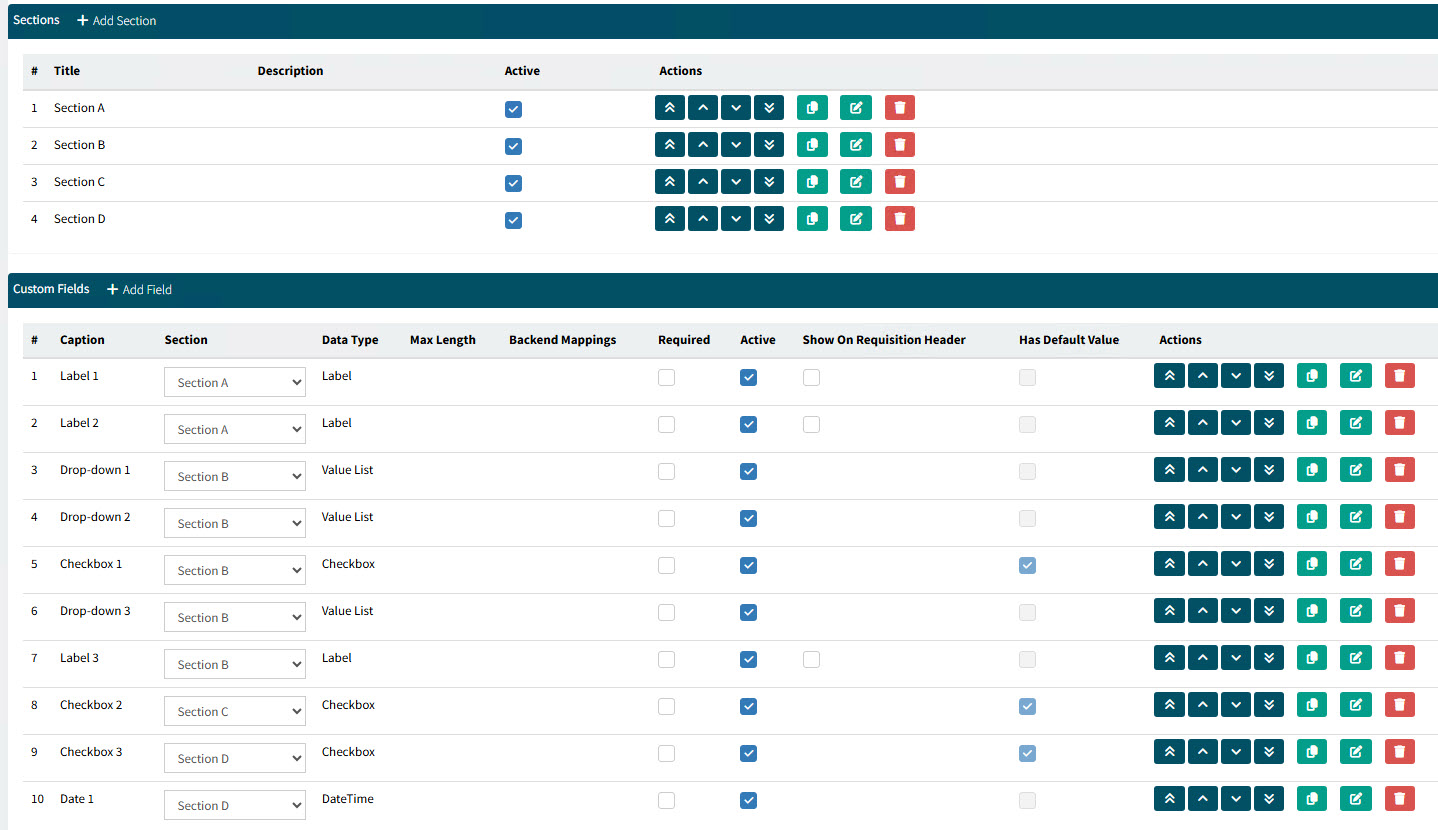
Sections appear on the custom form in the order they appear in this list. Each section takes up the width of the form, with allocated fields distributed into two columns (from left to right, row by row, in their listed order).
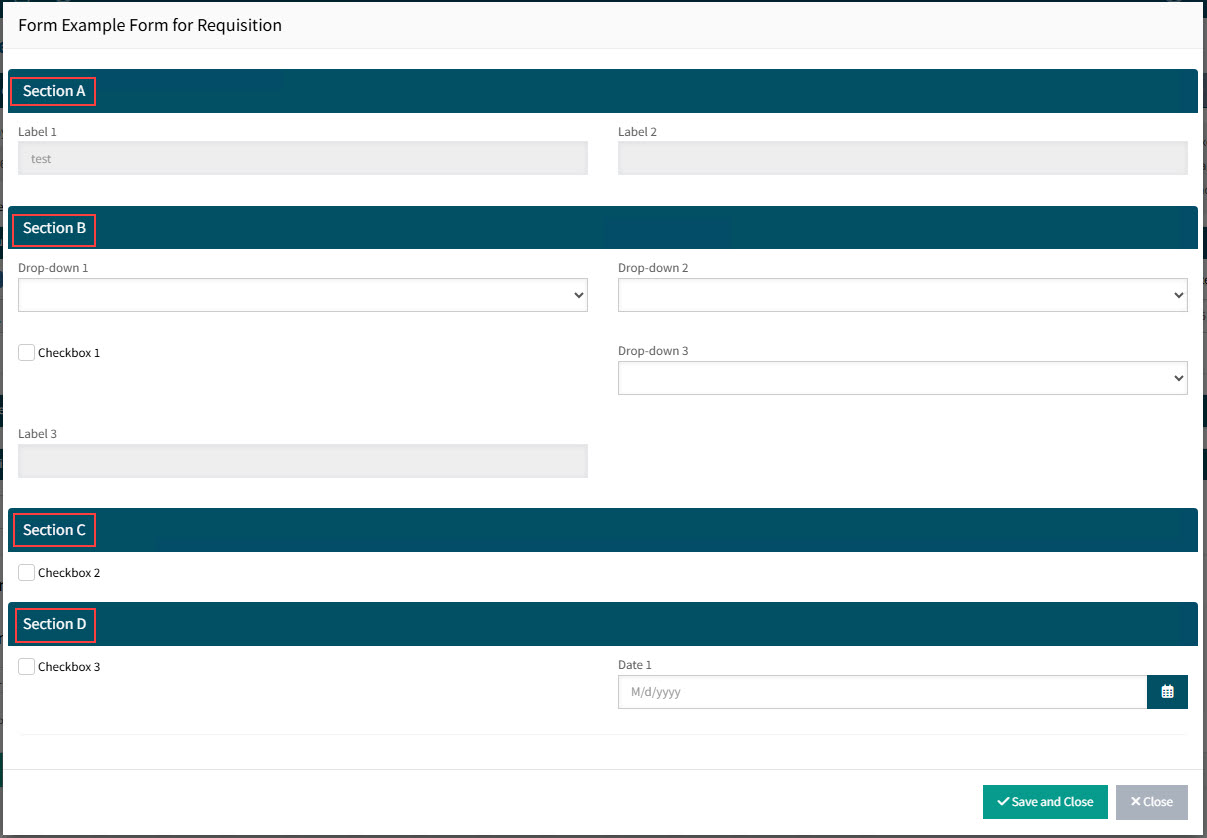
Example of sections in a custom form:
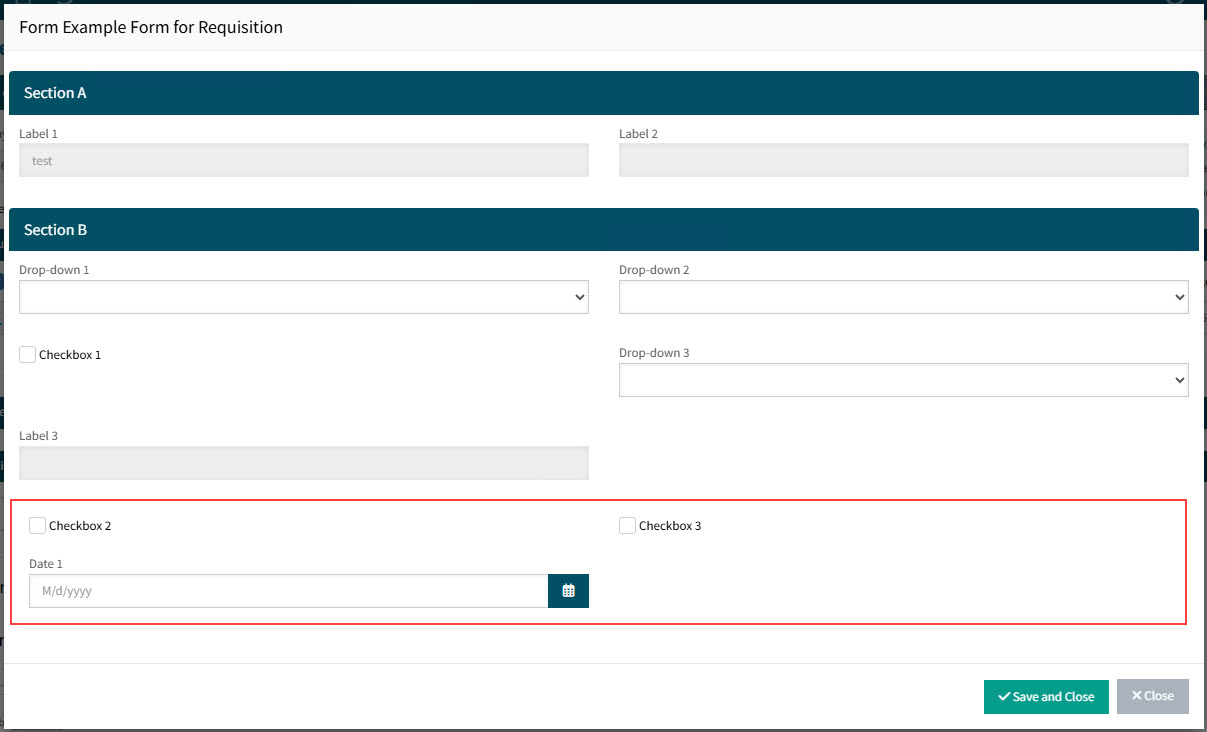
Custom fields that have not been assigned a section are listed below the sections.
Example custom fields without a section in a custom form:
-
To Copy, Edit, or Delete a section, use the buttons under the Actions column.

Complete the Custom Fields section:
You can add extra detail to a Requisition form by adding Custom Fields. On the Requisition, you would open the Custom Form to view and edit these fields. See Creating a Requisition for more detail.
To add a Custom Field:
-
Click Add Field on the Custom Fields section header.
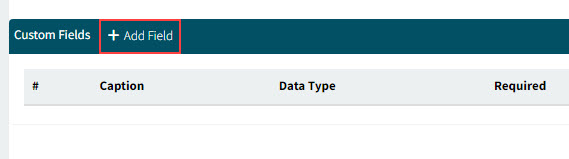
The Add new custom field pop-up screen displays.
-
Fill in the fields.
Details
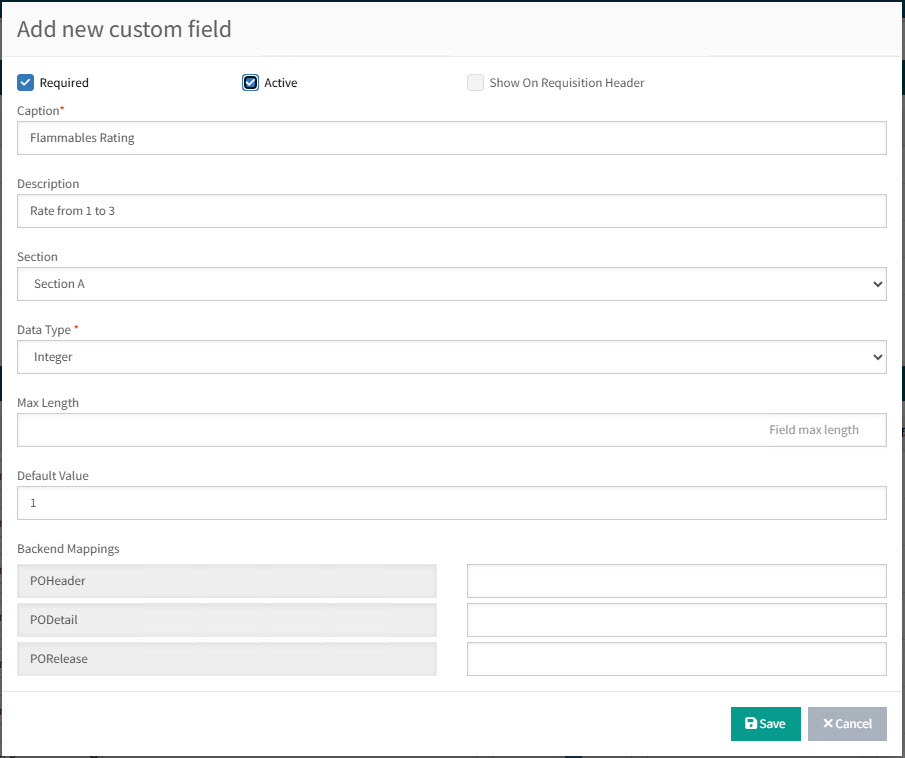
Required Select the Required check box to make the field mandatory on the custom form. This is then incorporated in the validation of the requisition.
Active The field must be active to appear on the custom form.
Show on Requisition Header The field appears on the requisition header, in the Requisition Type section.
You can only select this check box where the Data Type is Label or Markdown. Section If you have added sections, you can allocate this field to a section by selecting from the drop-down list of sections.
Data Type Select from the drop-down list.
-
For the Value List type, select a Value List from the drop-down list. See Value Lists.
-
For the Markdown type, enter markdown text in the Markdown Text box, for example a hyperlink to another site.
Max Length This appears if appropriate for the data type. Use it to limit the characters that can be entered.
Default Value This appears if appropriate for the data type. Use it to display a default value, such as text for a Text data type.
Backend Mappings Optionally map values to the back-end by entering values for POHeader and/or PODetail and/or PORelease.
If a custom field has a back-end mapping defined, then the value selected or entered for this field in a requisition is saved to the field by that name on the respective database table(s) (POHeader, PODetail, PORelease) for the PO originating from the requisition.
The creation of custom fields on the database tables is beyond the scope of this topic. -
-
Click Save to save the new Custom Field.
The new Custom Field is added

-
If there are multiple custom fields, you can organize their order of appearance, by using the arrow keys Move to top, Move up, Move down, Move to bottom under the Actions column.
-
-
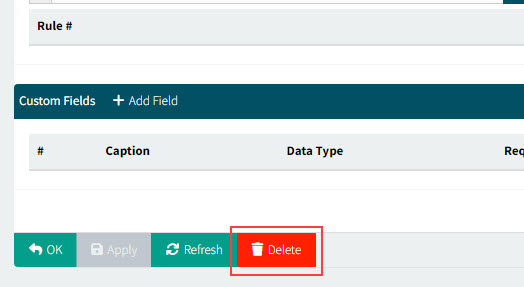
To Copy, Edit, or Delete a custom field, use the buttons under the Actions column.
-
Click Ok or Apply to save the changes to the Custom Form.
Editing a Custom Form
-
Open the Custom Form you want to edit.
-
Edit the fields, as described in the above section Adding a Custom Form.
-
Click Ok or Apply to save the changes.
Activating/Deactivating a Custom Form
When you create a new Custom Form, it is set to Active by default.
If you want to remove it from the available Requisition Types without deleting it, you can set it to Inactive. The Custom Form/Requisition Type will no longer be available in the Requisition Type drop-down list on the Requisition form, or on the User > User Detail page.
-
Open the Custom Form you want to deactivate.
-
Clear the Active check box.
-
Click OK or Apply to save the changes.
Inactive Custom Forms is grayed out on the Custom Form Designer page and without the Active label.
|
Assigning Custom Form to Users
If this a new Custom Form, you can now assign it to various users. See User Access to requisition Types.