Creating an AP Invoice
Permissions
Creating an AP Invoice only appears if AP Invoice is included in your permissions.
Note on Vendors
You may only select Vendors that belong to your assigned Vendor Groups when adding or editing a Draft Invoice or an AP Invoice.
-
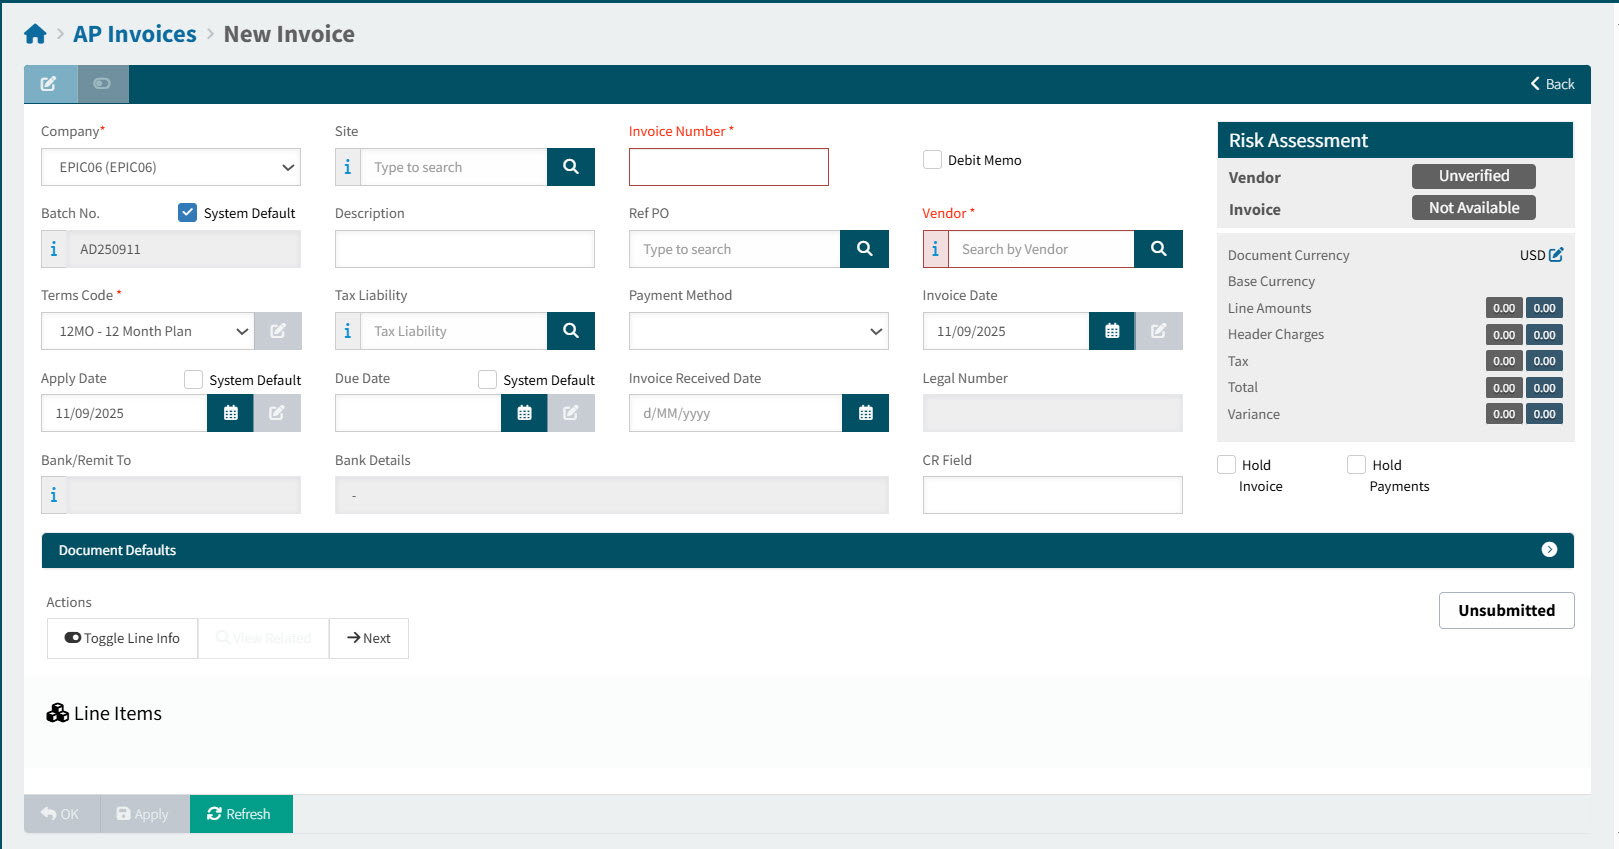
Select Create a new document from the Top Menu bar, then select AP Invoice from the menu (see Creating a New Document).
The AP Invoices > New Invoice form displays.
-
Add AP Invoice header details as needed.
Header Details
- Company
-
Select a company from the drop-down list. The Company defaults to your Default Company. You only have access to Companies that include your assigned sites.
- Site
-
Select a site from the drop-down list.
Note: Only your assigned sites that also belong to the selected Company are available for selection.
- Invoice Number
-
The number that identifies the AP invoice or debit memo. You can use any combination of letters or numbers. This value uniquely identifies each invoice or debit memo.
Each invoice number must be unique for each vendor (supplier). You can, however, use the same invoice number for a different vendor (supplier). - Debit Memo
-
Select this check box if you want to create a Debit Memo instead of an AP Invoice.
- Batch No
-
The Batch Number will be used as the Invoice Group ID when invoices belonging to the batch are approved in ARM, and ready to be posted in Kinetic. Choose from one of the Batch No. options:
Batch No. Options:
-
Select Auto Increment to apply the system default Batch No. which updates daily until the AP Invoice is approved.
Each day, the Batch No. updates to the current date in the format of YYYYMMDD or, if a two-character prefix AP Invoice Batch Number Prefix has been configured, then the Batch No updates to the current date preceded by the prefix [PP], in the format [PP]YYMMDD, for example MN250826, and the following day MN250827, and so on.
ARM uses the AP Invoice Batch Number Prefix in order of precedence, from:
-
the current-logged in User’s details (see User Detail section in the Information tab), if available, or
-
the selected Vendor (see Maintaining Vendors), if available, or
-
the selected Vendor Group (see Vendor Groups), if available, or
-
the Company Settings on the selected Company (see Company General Settings), if available.
OR
-
-
Clear Auto Increment to:
-
Enter an existing Batch No.
-
Manually create a new batch. The new Batch Number is entered into the AP Invoice Batch No. field.
-
Click
 New, then enter a Batch Number and Batch Description, and click OK.
The new batch is added.
Note: This requires the permission Edit AP Invoice Batch Number.
-
-
Search
 for a manually created Batch No.
-
-
- Description
-
Use the Description field to enter invoice information. This information helps other users identify the invoice while they process it in Kinetic.
- Ref PO
-
Optionally enter a reference purchase order number, which will appear on the invoice in Kinetic.
You can enter an existing PO number. Otherwise select from the drop-down list, or click the search button to select an Order No from the Purchase Order Search screen.
The Terms Code and Tax Liability fields update to those from the referenced PO.
- Vendor
-
Select the Vendor that the invoice will be sent to.
- Terms Code
-
Specifies the conditions under which your company will pay for a purchase order.
- Terms
-
The Terms defaults to the first available from:
-
Supplier (Vendor), if available, otherwise
-
Company settings
If there is a Ref PO, the Terms Code from the PO is used here.
Note: To update the Terms Code, you require the permission Edit AP Invoice Terms Code.
-
- Tax Liability
-
This defaults to the Vendor’s Tax Liability, if available, otherwise the Company’s Default Tax Liability.
If there is a Ref PO, the Tax Liability from the PO is used here.
- Payment Method
-
Defines the method you use to pay the supplier on the current invoice. The default payment method selected on the supplier record displays by default.
- Invoice Date
-
The date on the original Invoice. This could be an Invoice Date, or a Billing Date.
This requires the permission Edit AP Invoice’s Invoice Date.
- Apply Date
-
The date used to book journals created from the transaction. The fiscal calendar used by the book determines the period to which the journals post.
To select the current date, select Use current date.
The Apply Date may not be before the Company’s Earliest Apply Date (see Company Settings). If the entered Apply Date is before the Earliest Apply Date, it overwritten by the Earliest Apply Date on submission.
- Due Date
-
Specifies the date on which payment on this invoice is due.
The Due Date for AP Invoices is calculated from the Invoice Date and the number of days from the terms.
To select a different date, select Override then select a different date.
This requires the permission Edit AP Invoice Due Date.
- Legal Number
-
The invoice’s legal number from Kinetic is displayed here.
- Bank/ Remit To
-
Select a bank or remit to for the payment from the drop-down list. The list only contains records for the current vendor.
- Bank Details
-
The bank details for the selected bank, if applicable.
- Custom Data fields
-
Custom fields will display on the AP Invoice page, provided the company setting AP Invoice�Header’s Custom Data has a value.
Example of Custom Data Fields
- Reference No
-
Optionally enter a reference number for the invoice.
- Remark
-
Optionally add a remark for the invoice.
What happens to the Custom Data Fields on AP Invoice:
The custom data field(s) and their value(s) are stored in the ARM database.
If Kinetic has the corresponding user-defined fields defined, then the values are stored there.
For more details, see Company General Settings, setting AP Invoice Header’s Custom Data.
- Hold Invoice
-
When selected, this check box indicates that the entire invoice is on hold. You place an invoice on hold if it is disputed or if you need supervisor approval before they are posted.
- Hold Payment
-
When selected, this check box indicates that payments will not be made against this invoice.
Important: You can change the Hold status on this sheet before or after the invoice is posted.
- Created By and Created Date
-
On the bottom right of the page, the Created By and Created Date appear. For example: "Created by armadmin on 3/18/2025 14:50:23."
-
Optionally set the document defaults. See Setting Document Defaults.
-
Add one or more Invoice Lines. See Adding Invoice Line Items.
-
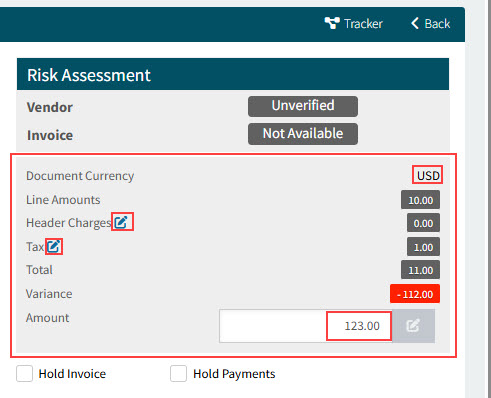
Update the document header values.
See Detail
-
Update the Document Currency if required (not possible in the example shown).
-
Capture one or more Header Charges, if required.
See Detail
-
Click the Header Charges edit
 icon to open Header Charges.
 -
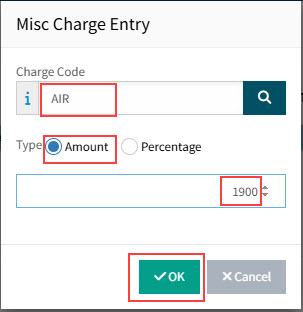
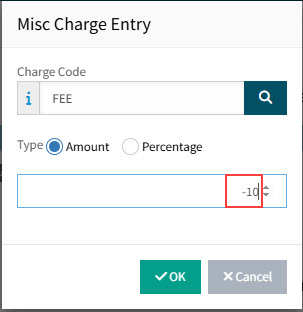
Click the Add Misc Charge button to open Misc Charge Entry.

In Misc Charge Entry:
-
Select a Charge Code.
-
Select a Type (Amount or Percentage).
-
Click OK.
-
Continue to add Misc Charges as necessary. Misc Charges can also be negative, as shown below.
-
-
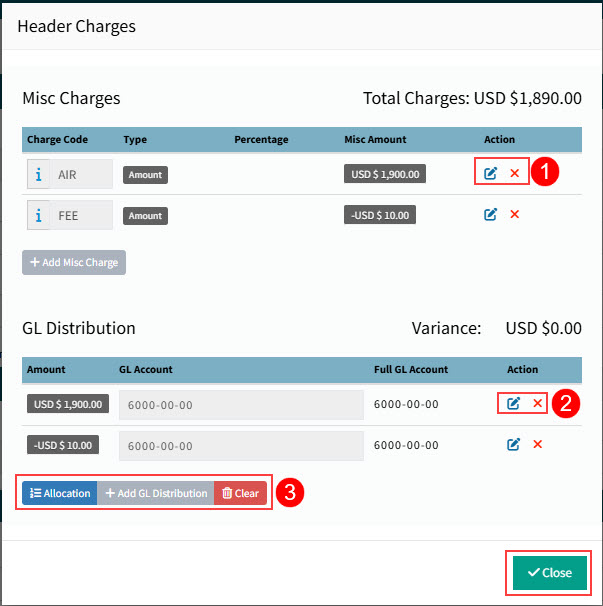
You can:
-
Edit or remove any of the Misc Charges.
-
Edit or remove the GL Distribution for the Misc Charges.
-
Change the Allocation or add GL Distribution.
-
-
Click Close to finish adding Header Charges.
-
-
Edit the Tax, if required.
See Detail
-
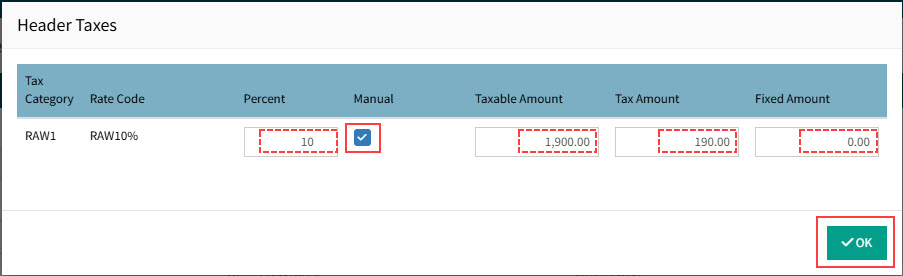
Click the Tax edit
icon to open Header Taxes. -
Select the Manual check box, which makes the fields editable.
-
Edit one or more of the fields: Percent, Taxable Amount, Tax Amount, or Fixed Amount.
-
click OK.
-
-
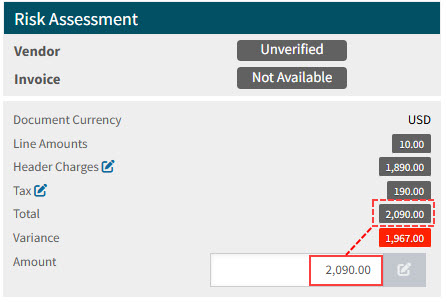
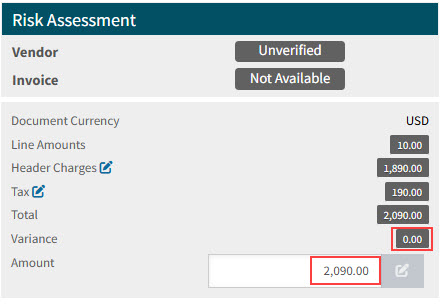
Enter the invoice Amount. This should equal the Total, and will bring the Variance to zero.
See Detail
-
Click Apply on the Footer Menu.
The variance now equals zero, and the invoice can be submitted.
See Detail
-
-
Add attachments to the AP Invoice. See Adding Attachments to the AP Invoice.
-
When the invoice is ready, you can submit it. See Submitting an AP Invoice.
Adding Invoice Line Items
For an AP Invoice with an Unsubmitted Status:
-
You can add one or more line items and you can import a misc line.
 From Receipts - Add from Receipts to Invoice.
 Unreceived - Add Unreceived to Invoice.
 Add DMR Credits - Add DMR Credits to Invoice (only for Debit Memos).
 Advance Bill - Add Advance Bill to Invoice (only for Invoices).
 Miscellaneous Line - Add Misc Line to Invoice.
 Job Misc Line - Add Job Misc Line to Invoice.
 Import Misc Line - Import Misc Line to Invoice.
Adding Lines from Receipt
-
Select
 Add > From Receipts at the bottom of the page.
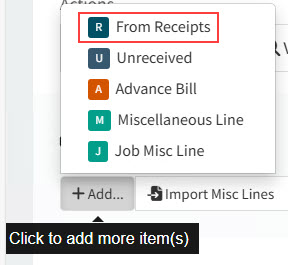
This opens the Purchase Order Receipts pop-up.
-
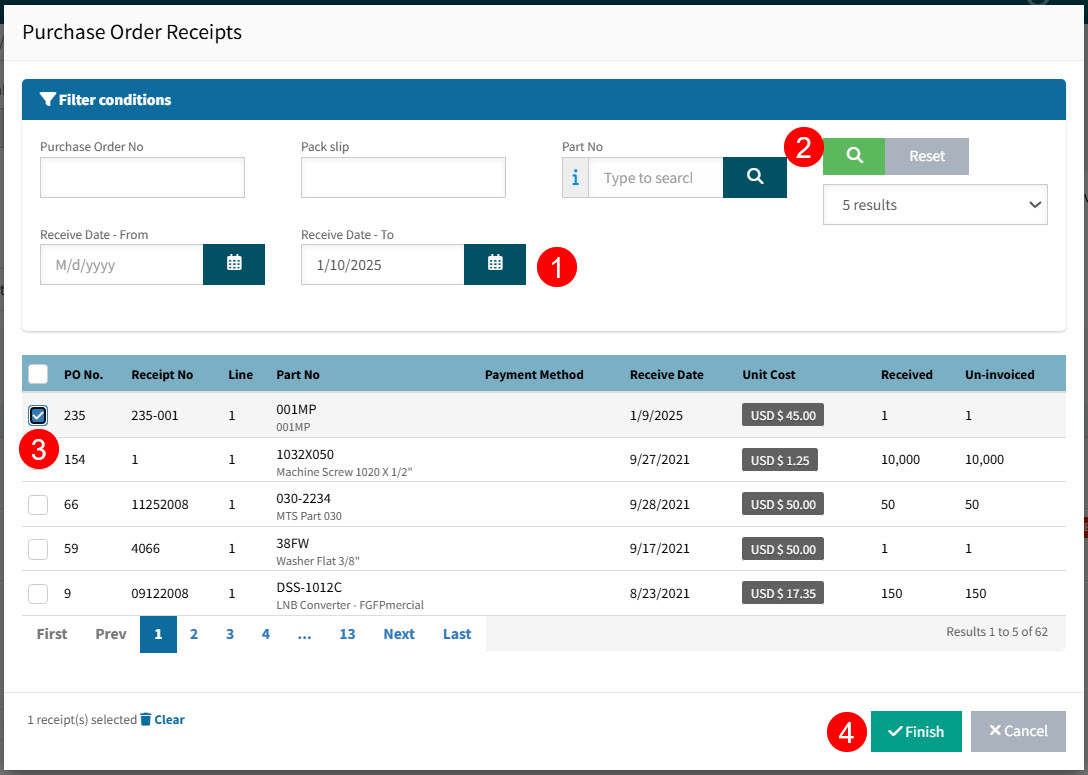
Select one or more received lines on the Purchase Order Receipts pop-up:
View Details
-
Set the search parameters and click the search
 button.
 -
Select one or more PO Receipt lines and click Finish.
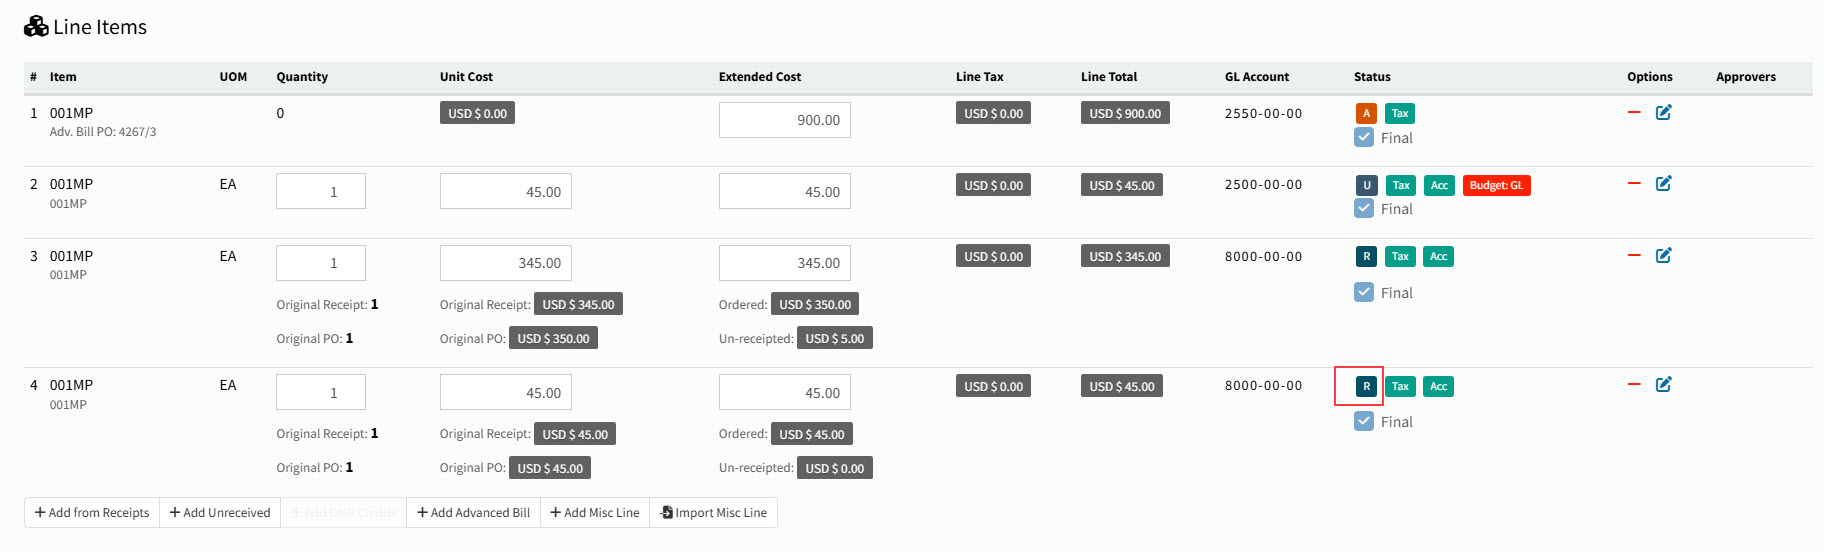
The selected line(s) are added as new AP Invoice lines and given a Line Type 'R', which appears under the Status column.
New line added
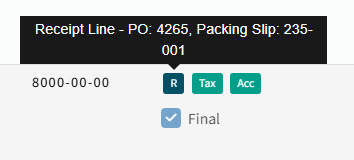
Hover over the Line Type
-
Add Unreceived to Invoice
Invoice lines for unreceived purchase order lines do not require a receipt.
| This option is not available for a Debit Memo. |
Permissions
Requires the permission APInvoiceUnreceivedLineType.
-
Select
Add > Unreceived at the bottom of the page.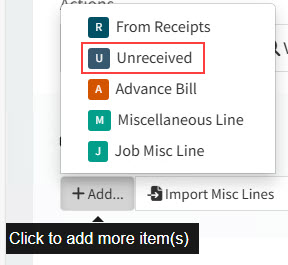
This opens the Unreceived Purchase Orders pop-up.
-
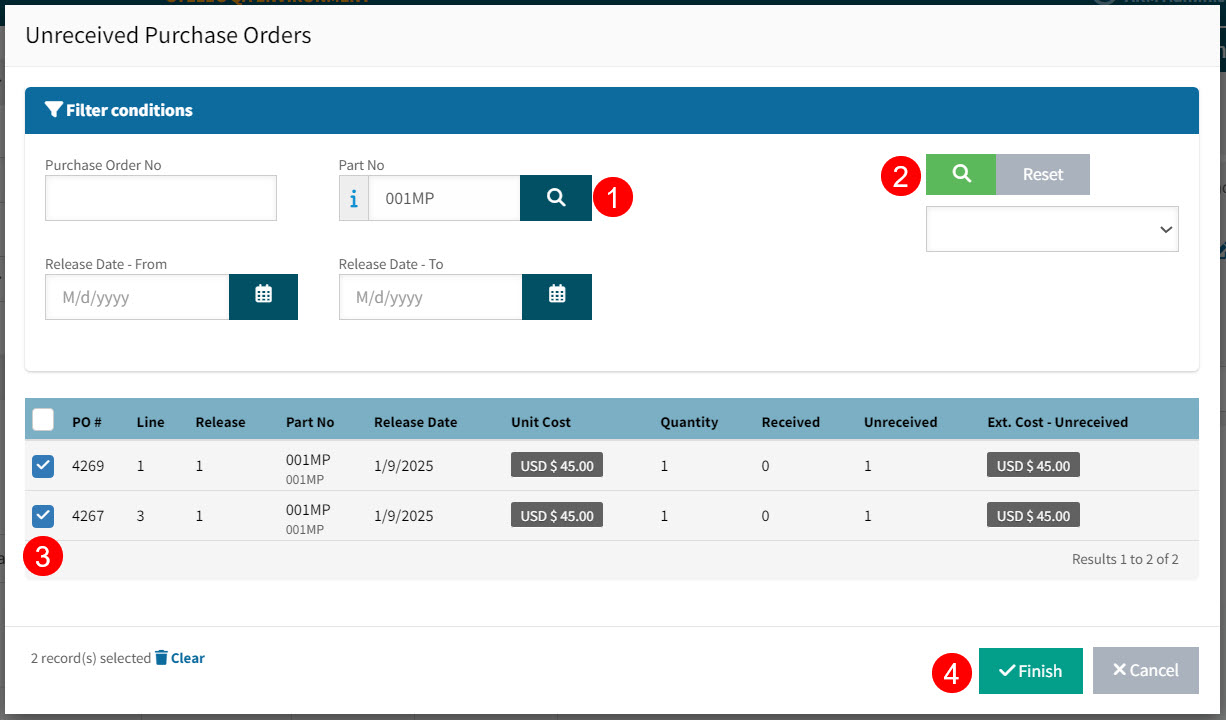
Select one or more unreceived lines on the Unreceived Purchase Orders page:
View details
-
Set the search parameters and click the search
button. -
Select one or more PO lines and click Finish.
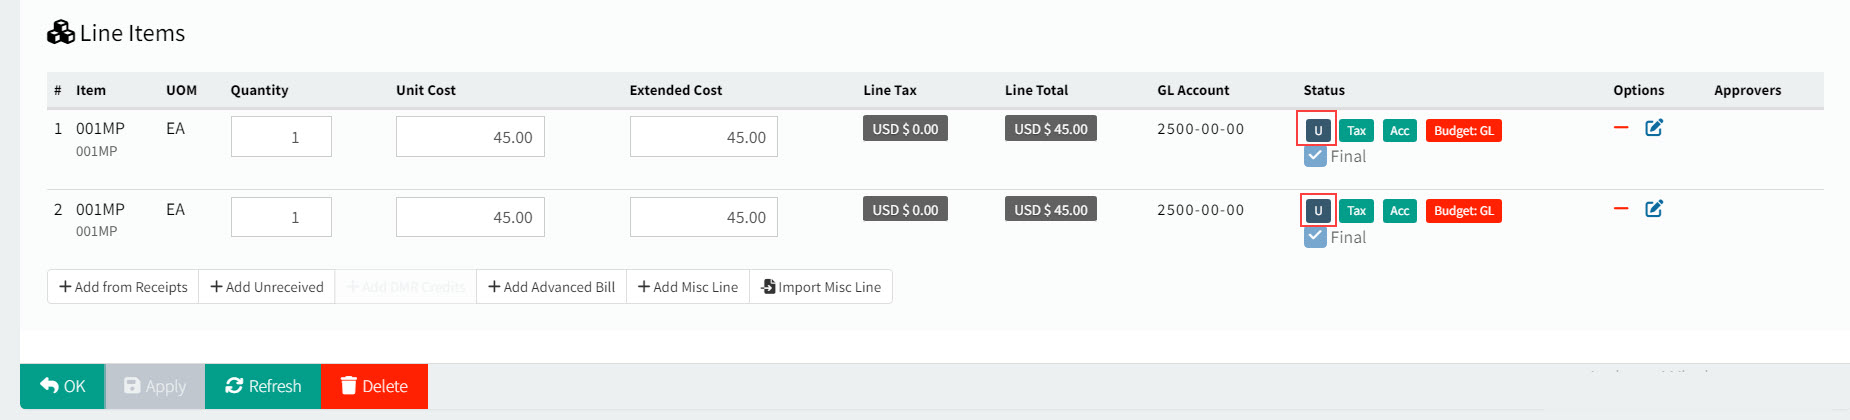
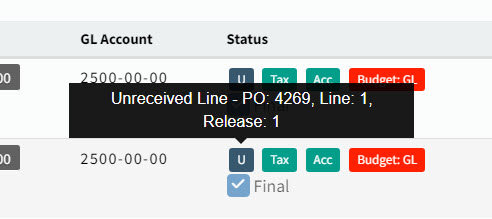
The selected line(s) are added as new AP Invoice lines and given a Line Type 'U', which appears under the Status column.
New line added
Hover over the Line Type
-
Add DMR Credits to Invoice
Permissions
Requires the permission APInvoiceDmrCreditLineType.
| This option is only available for a Debit Memo. |
-
Select
Add > DMR Credits at the bottom of the page.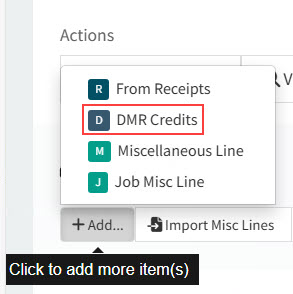
Add Advanced Bill to Invoice
Advance Billing invoice lines do not require a receipt.
Select advance billing on a PO that you will receive later.
| This option is not available for a Debit Memo. |
Permissions
Requires the permission APInvoiceAdvancedBillLineType.
-
Select
Add > Advance Bill at the bottom of the page.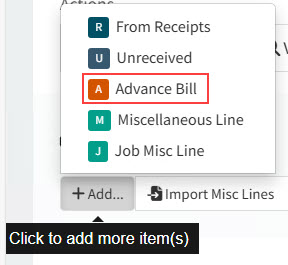
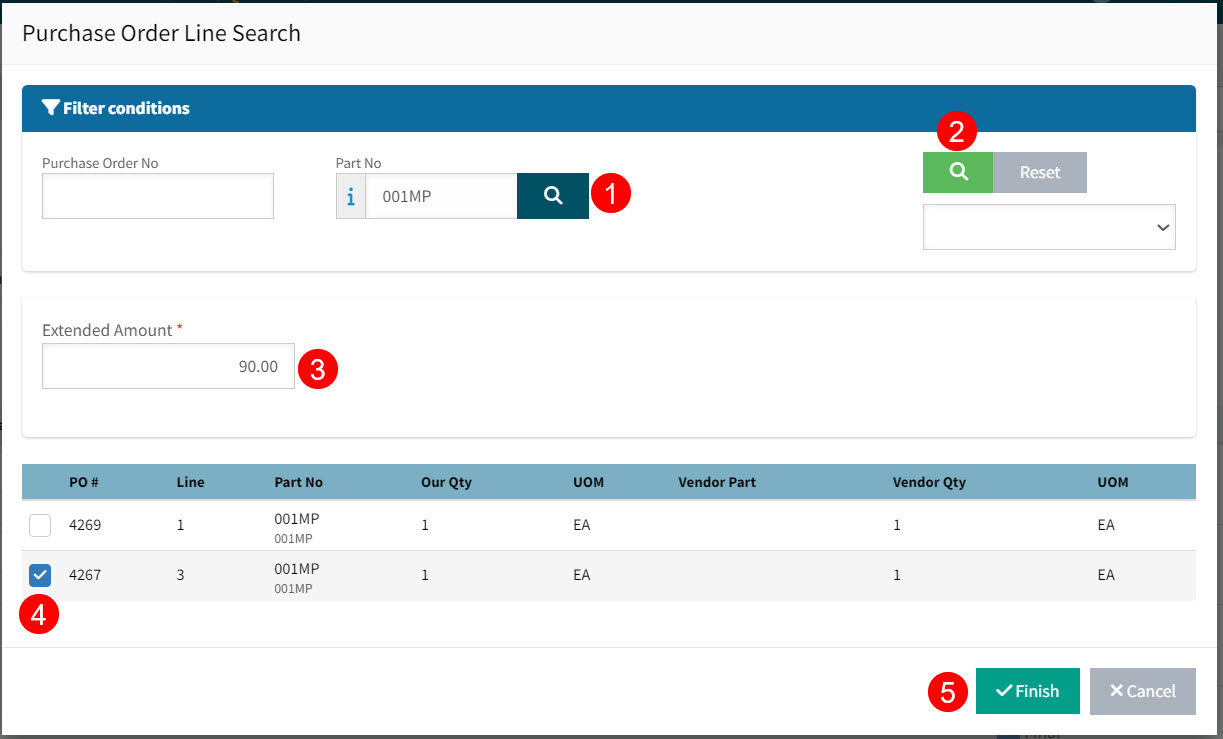
This opens the Purchase Order Line Search pop-up.
-
Select an unreceived line, giving an Extended Amount, on the Purchase Order Line Search page:
View details
-
Set the search parameters and click the search
button. -
Enter an Extended Amount.
-
Select a PO line.
-
Click Finish.
-
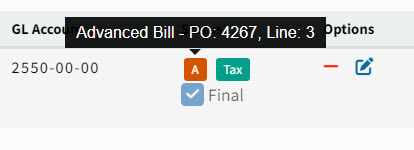
The selected line is added as a new AP Invoice line, with the entered Extended Amount appearing in the Extended Cost column and a Line Type 'A', which appears under the Status column.
New line added |
|
|
|
Hover over the Line Type |
|
|

Updating GL Distribution
-
To edit the GL Account information in the GL Distribution Entry pop-up, click the Edit
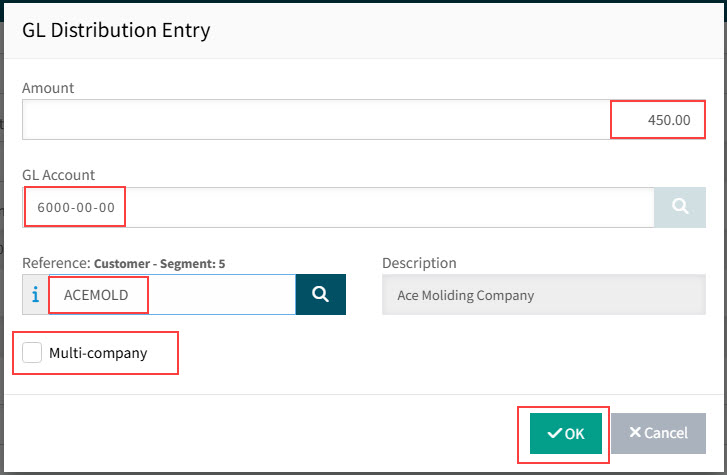
button.In the GL Distribution Entry pop-up:
-
Edit the Amount.
-
Select a Reference.
-
Optionally select the Multi-company check box.
-
Click OK.
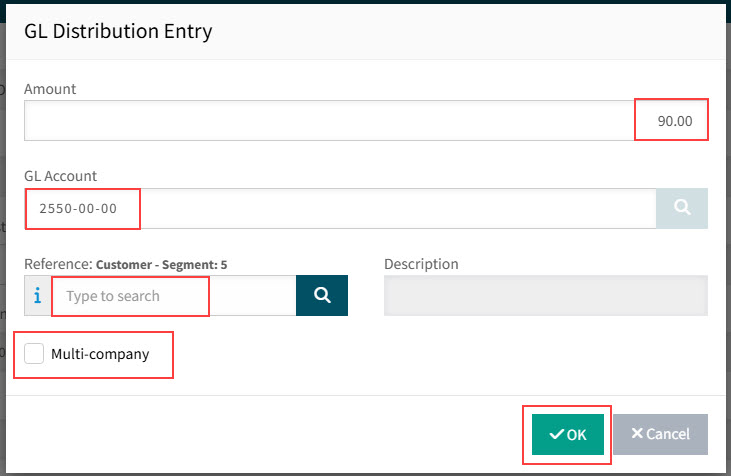
The GL Distribution is updated.
-
Add Misc Line to Invoice
A miscellaneous line is not attached to a receipt, but can be added as an expense to an AP Invoice. You may also defer the expense.
-
Select
Add > Miscellaneous Line at the bottom of the page.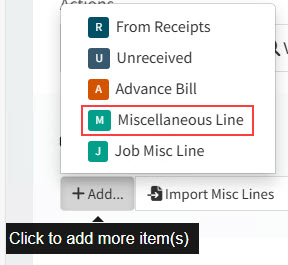
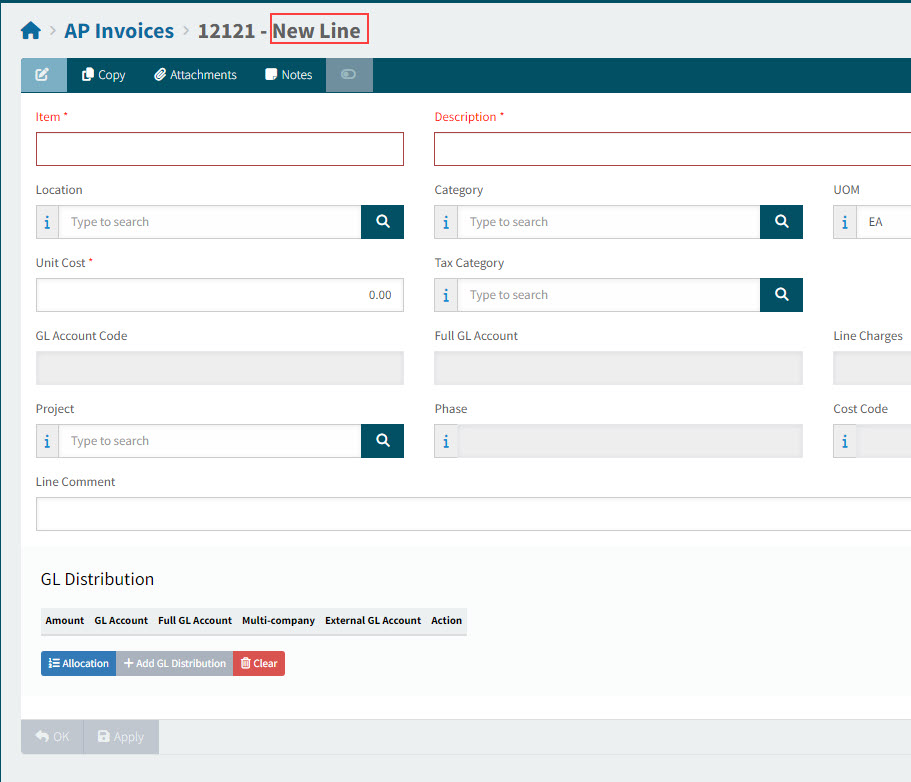
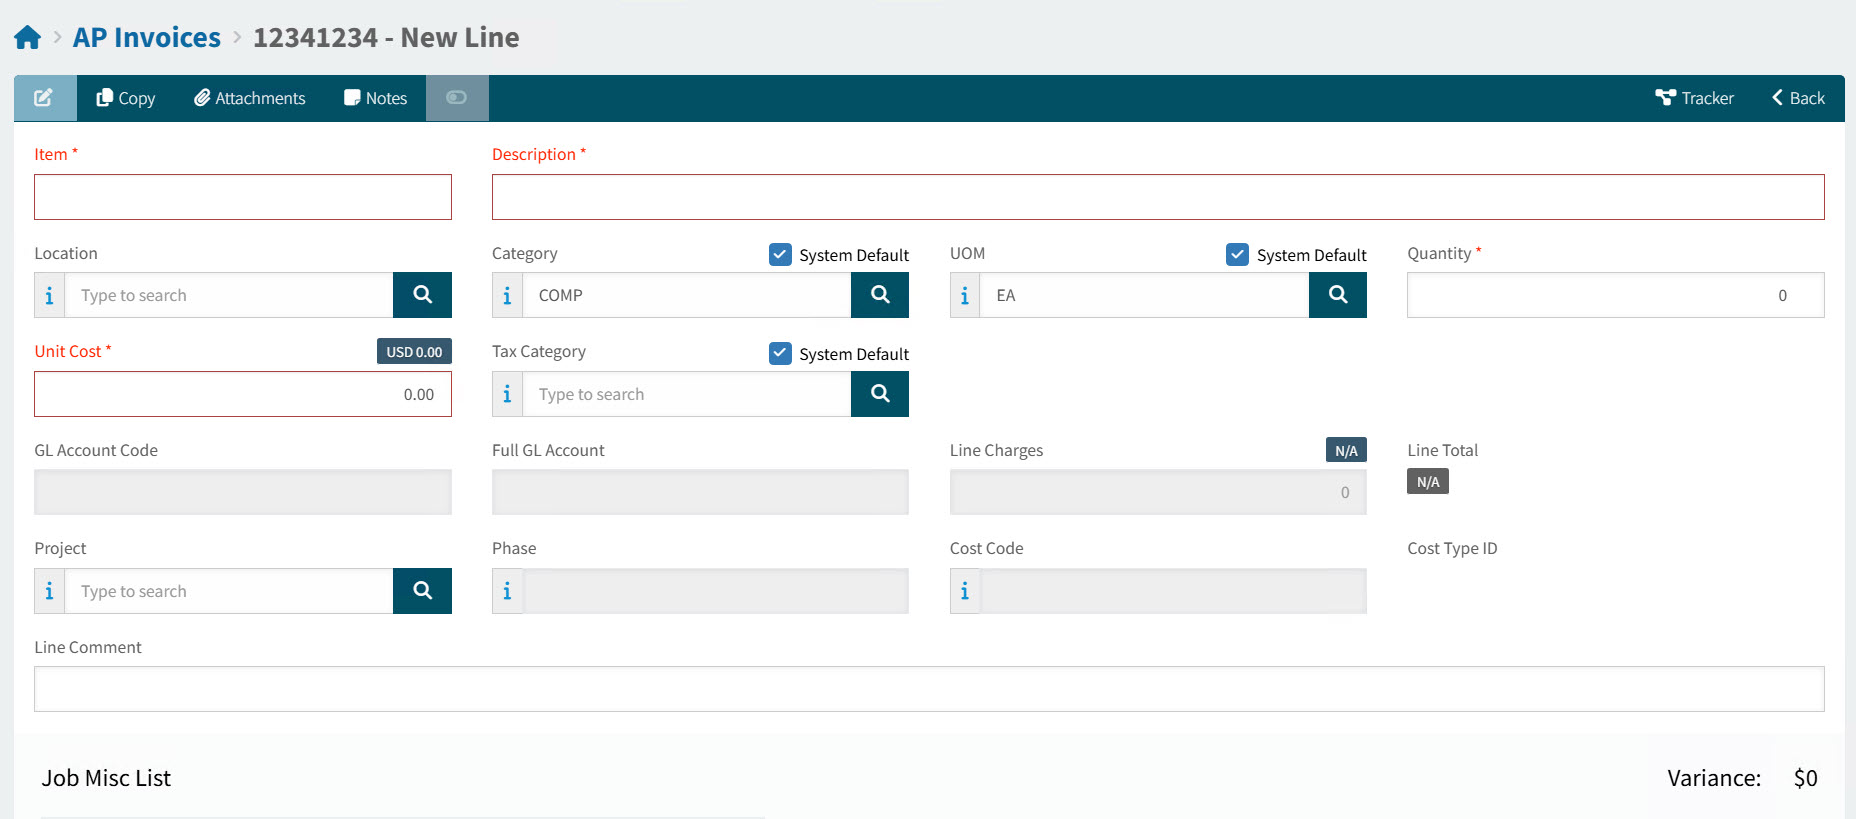
This opens a page for the new AP Invoice line.
View details
-
Capture the Misc Line details.
-
Enter an Item code.
-
Enter an item Description.
-
Optionally select a Location, Category, and UOM.
-
Enter a Quantity.
-
Enter a Unit Cost.
-
Optionally select a Tax Category.
-
Optionally select a Project, Phase, and Cost Code.
-
Optionally enter a Line Comment.
ARM attempts to build a GL Account Code from the available account segments from the selected Vendor, Location, Category etc., according to the sequence stipulated in the GL Account Mask Sequence in Global Settings.
-
If the GL Account Code is empty, ARM uses Kinetic’s Default Purchase Expense GL Account as the default.
-
If there is a partial GL Account Code, you need to edit the GL Distribution to update the GL Account Code.
-
-
Click Apply to save the line.
-
After the Misc Line is saved, you may defer the expense.
Deferring Expense
You may defer the expense, choosing an amortization code set up in Kinetic. The expense is amortized over the resultant schedule.
To defer the expense:
-
Select Defer Expense.
This expands a panel.
-
Select an Amortization Code from the drop-down list.
-
Select a Start Date.
-
Click Scheduled.
The End Date is calculated based on the Start Date and the selected Amortization Code.
View Details

To change the Amortization Code, first click Delete Schedule. -
-
If there is a Variance (value not equal to zero), adjust the GL Distribution.
-
Optionally adjust the GL Distribution and Allocations for the Misc Line’s Extended Cost.
Updating GL Distribution and Allocations
Use the GL Distribution options to distribute the expense amount among one or more GL Accounts. You can add or remove GL Accounts, update amounts, and use Allocations to allocate to predefined GL Accounts at predefined percentages.

-
To edit the GL Account information in the GL Distribution Entry pop-up, click the Edit
button.In the GL Distribution Entry pop-up:
-
Edit the Amount.
-
Select a Reference.
-
Optionally select the Multi-company check box.
-
To remove the distribution row, click the Remove
 button.
-
-
To enter an allocation for part or all of the expense amount, click Allocation.
In the Allocation Entry pop-up:
-
Select an Allocation from the drop-down list.
-
Enter an Amount to be spread across the allocation.
-
Click OK.
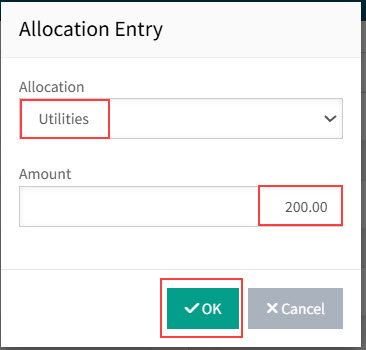
The amount is allocated by percentage across the different GL Accounts that form the allocation, according to each account’s percentage.
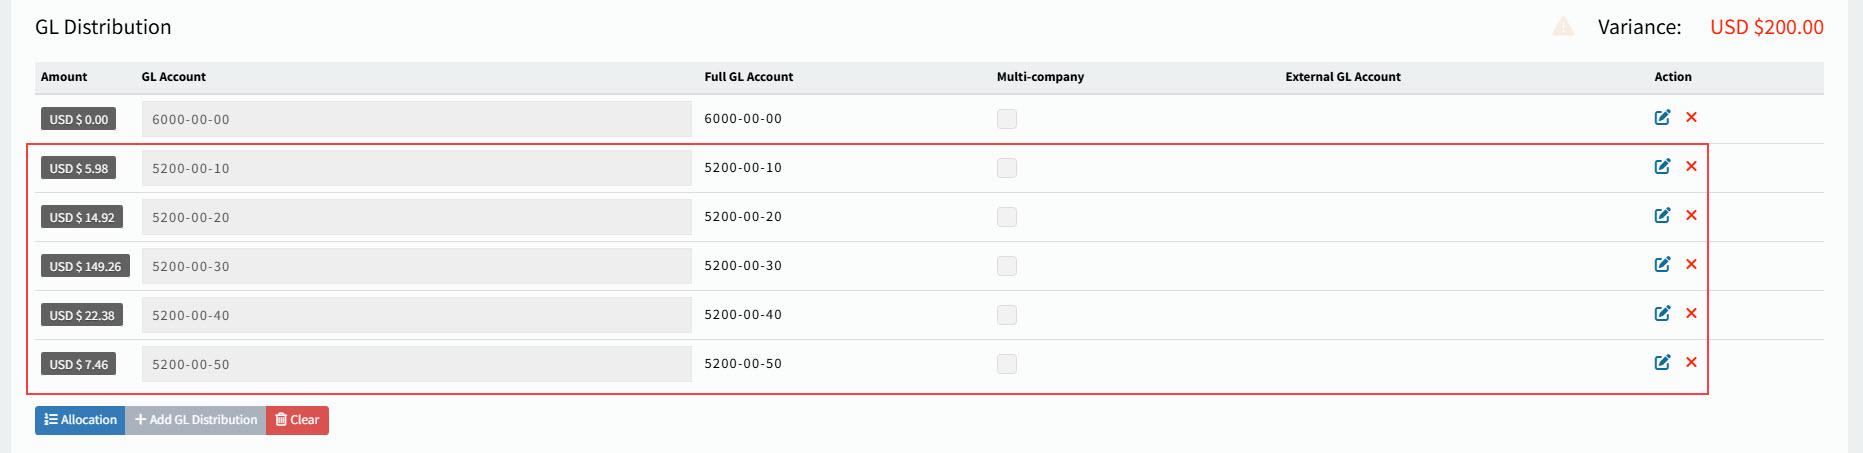
-
-
To add a GL Account for part or all of the expense amount, click Add GL Distribution. Edit the GL Distribution fields, as described above.
-
To remove all rows from the GL Distribution, click Clear.
Add Job Misc Line to Invoice
-
Select
Add > Job Misc Line at the bottom of the page.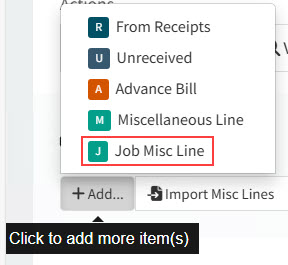
This opens a page for the new AP Invoice line.
View details
|
-
Capture the Job Misc Line details.
-
Enter an Item code.
-
Enter an item Description.
-
Optionally select a Location, Category, and UOM.
-
Enter a Quantity.
-
Enter a Unit Cost.
-
Optionally select a Tax Category.
-
Optionally select a Project, Phase, and Cost Code.
-
Optionally enter a Line Comment.
ARM attempts to build a GL Account Code from the available account segments from the selected Vendor, Location, Category etc., according to the sequence stipulated in the GL Account Mask Sequence in Global Settings.
-
If the GL Account Code is empty, ARM uses Kinetic’s Default Purchase Expense GL Account as the default.
-
If there is a partial GL Account Code, you need to edit the GL Distribution to update the GL Account Code.
-
-
Click Apply to save the line.
Import Misc Line to Invoice
-
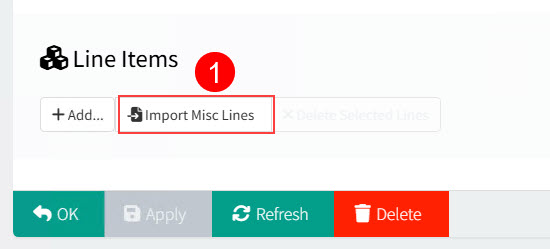
Select
 Import Misc Line at the bottom of the page.
View details
-
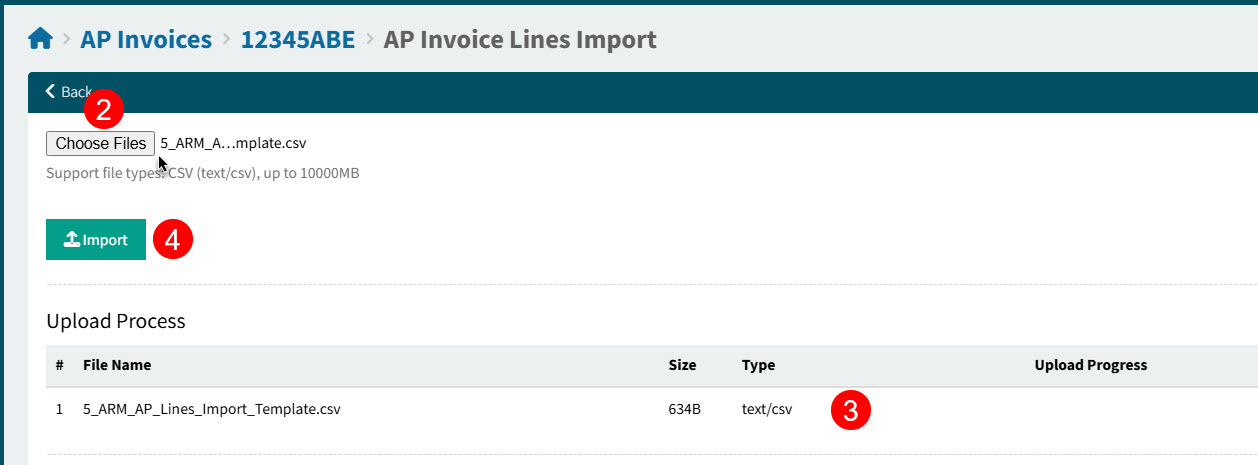
Click Choose Files to select one or more Misc Line files. In the file manager, browse to locate the files, then select and click Open.
-
The selected file(s) are added and appear in the Upload Process section.
-
Click Import to import the file contents.
-
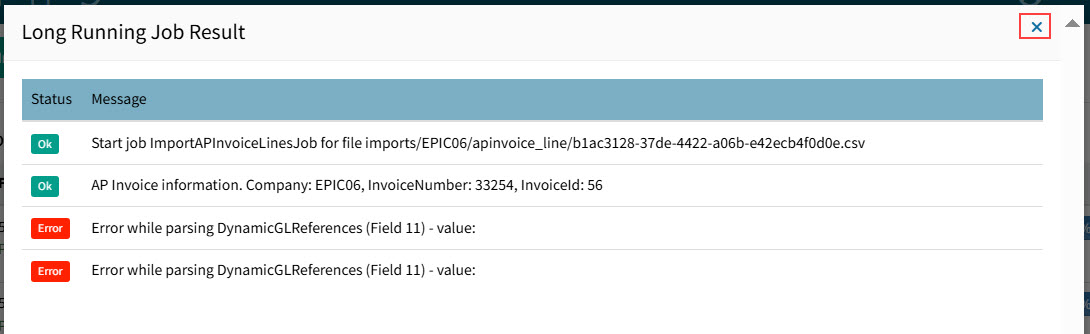
When the Upload Progress column shows 100% Completed, check the job Status. To view the job details, click Job Results.
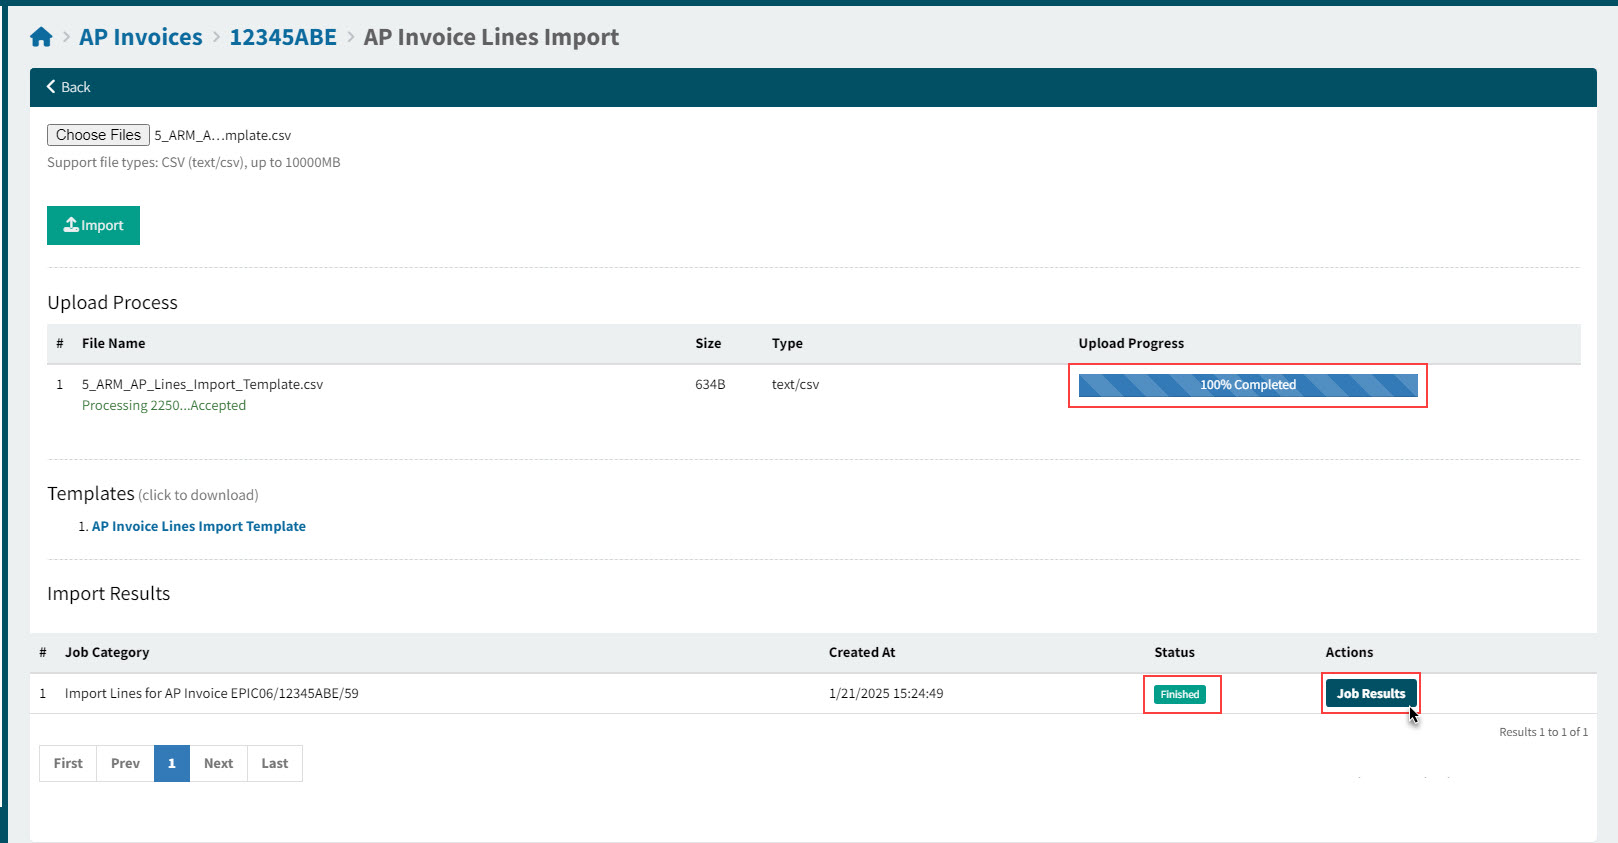
For the Finished status, there are no errors.
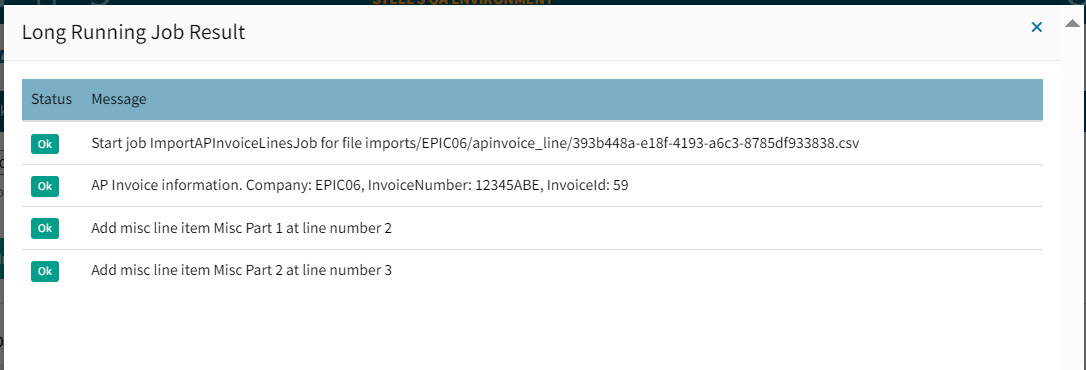
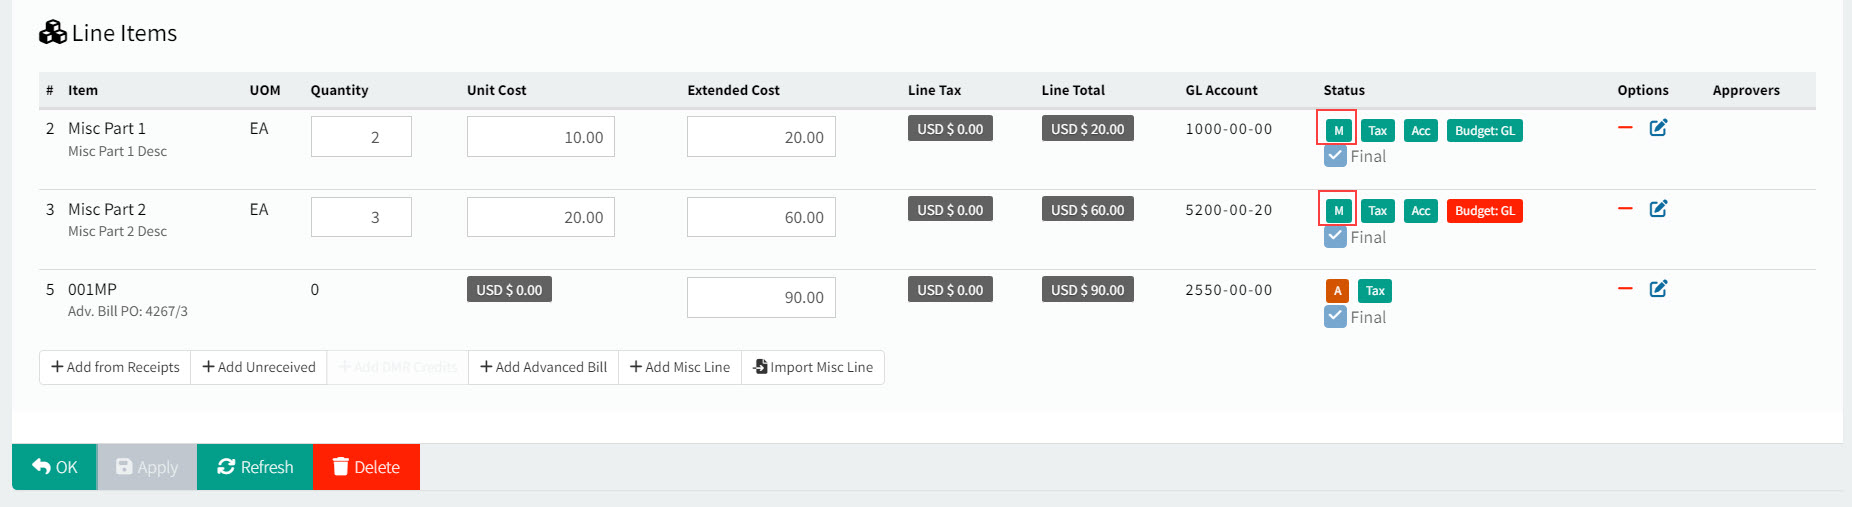
In our example, the two misc lines were imported successfully.
-
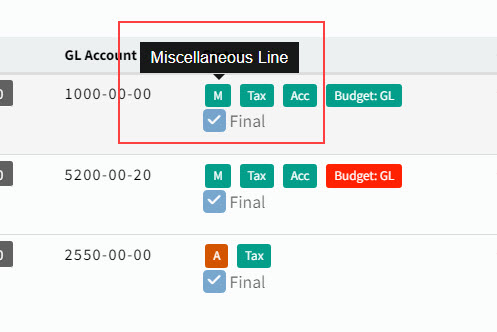
Hover over the Line Type "M" in the Status column, to see the details.
-
You can now edit the Misc Lines, if required. See Adding Misc Line to Invoice to see how to update the Misc Line details, Defer the Expense, or change the GL Distribution and Allocations for a Misc Line.
Preparing a file to import:
If you do not already have a Misc Line file to import, you can prepare one as follows:
-
In the Templates section, click on one of the template files.
This downloads the file.
-
Open the file from your Downloads folder.
-
Edit the contents, following the instructions that are included in the file.
-
Save the file.
If there are errors in the import job:
-
If there are errors, click Job Results under the Actions column to view details.
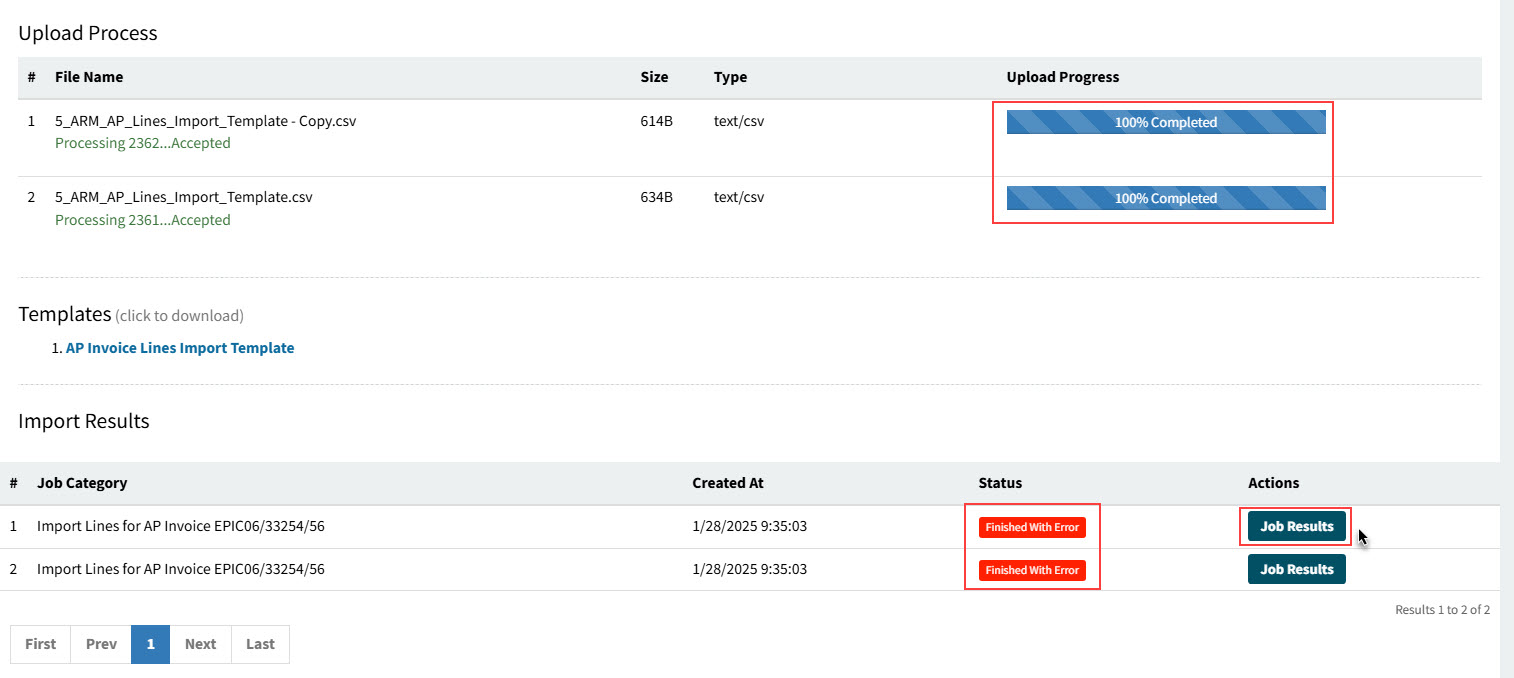
-
Check the Long Running Job Results and adjust the import file(s) accordingly, before reattempting the import.